How to Find a Lost Drone: Step-by-Step Guide
Losing a drone is not just frustrating—it’s an adventure waiting to unfold. The search isn’t guesswork; it’s a science grounded in precision and strategy. Over the years, I’ve recovered more lost drones than I’d care to count. While trudging up mountains and through swamps isn’t my idea of fun, the thrill of recovering that valuable equipment is undeniable.
Essential Tools for Drone Recovery
Equipped with the following tools, you’ll have everything you need to trace your drone’s flight path and pinpoint its location:
Flight Record: Analyze your drone’s last flight path.
Google Earth Pro: Create a precise visual reference of the area.
Nova Maps: Transform flight data into actionable maps.
Avenza Maps: Use geoPDFs for offline navigation.
These tools help pinpoint your drone’s location and streamline your recovery efforts.
Step 1: Analyze Your Flight Records
Your controller’s Flight Records are a treasure trove of data that can lead you straight to your drone. Navigate to the last recorded flight, enable the satellite base layer, and replay the flight from start to finish.
Your controller’s flight records provide vital data:
Home point and last known coordinates
Final battery percentage and altitude
Speed at last known point and warning messages during the flight
These details will give you critical insights into your drone's behaviour and likely location.
Step 2: Map your Search Area with Google Earth Pro
Sync Your Flight Records to the Cloud
Before starting your search, make sure your flight records are synced to the cloud. This step is critical—if your controller is lost or damaged, cloud access ensures you still have the vital data needed for recovery.
Understand Your Drone’s Emergency Behaviours
Predicting your drone’s movements after losing connection or encountering a critical battery level is key to narrowing down your search area. Check your drone’s settings for the following behaviours:
Connection Loss: Most drones default to returning to the home point when the connection is lost. Is your drone set to this behaviour?
Battery Critical: How does your drone handle low battery situations? Does it land immediately, attempt to return home, or hover?
Understanding these programmed responses helps you anticipate where your drone might have gone after contact was lost.

1. Enable Terrain in Google Earth Pro
Enabling the Terrain feature in Google Earth Pro allows you to account for elevation changes in your search area, providing a more accurate representation of your drone’s flight path.

2. Plot Your Search Points in Google Earth Pro
Open Google Earth Pro and place pins to mark:
The last known location of the drone
The home point

3. Note the Home Point Elevation
If your drone’s altitude remained relatively constant throughout the flight:
Hover over the home point in Google Earth Pro
Check the elevation displayed in the bottom-right corner of the screen
Make a note of this elevation value

4. Draw a Line Between Points
You will want to draw a line connecting the last known point and the home point in Google Earth Pro
Calculate the total altitude by adding the flight altitude (above ground level) to the home point elevation
Example: If your home point elevation is 383 meters and your flight altitude is 500 meters:
383+500=833 meters
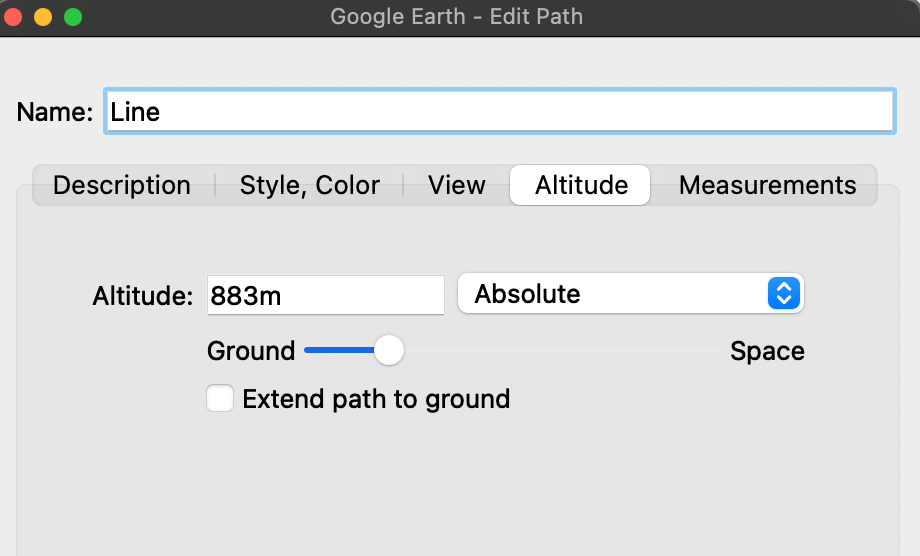
5. Edit the Line’s Altitude Settings
Right-click the line you’ve drawn and select Properties (or Edit)
Navigate to the Altitude tab
Set the altitude value to the total calculated in Step 2 (e.g., 883 meters)
Choose Absolute as your reference plane to reflect the actual height above sea level
Step 3: Determine the Likely Flight Path and Crash Site
After completing the previous steps, you’ll have a line connecting your Home Point and the last known point. This line serves two key purposes:
Obstacle Detection: Identify whether the drone could have collided with any obstacles (e.g., hills, trees, or buildings) along its flight path
Flight Path Estimation: Use the line, combined with information about battery life and wind speed, to estimate how far the drone might have traveled before triggering critical battery actions (e.g., landing or returning home)
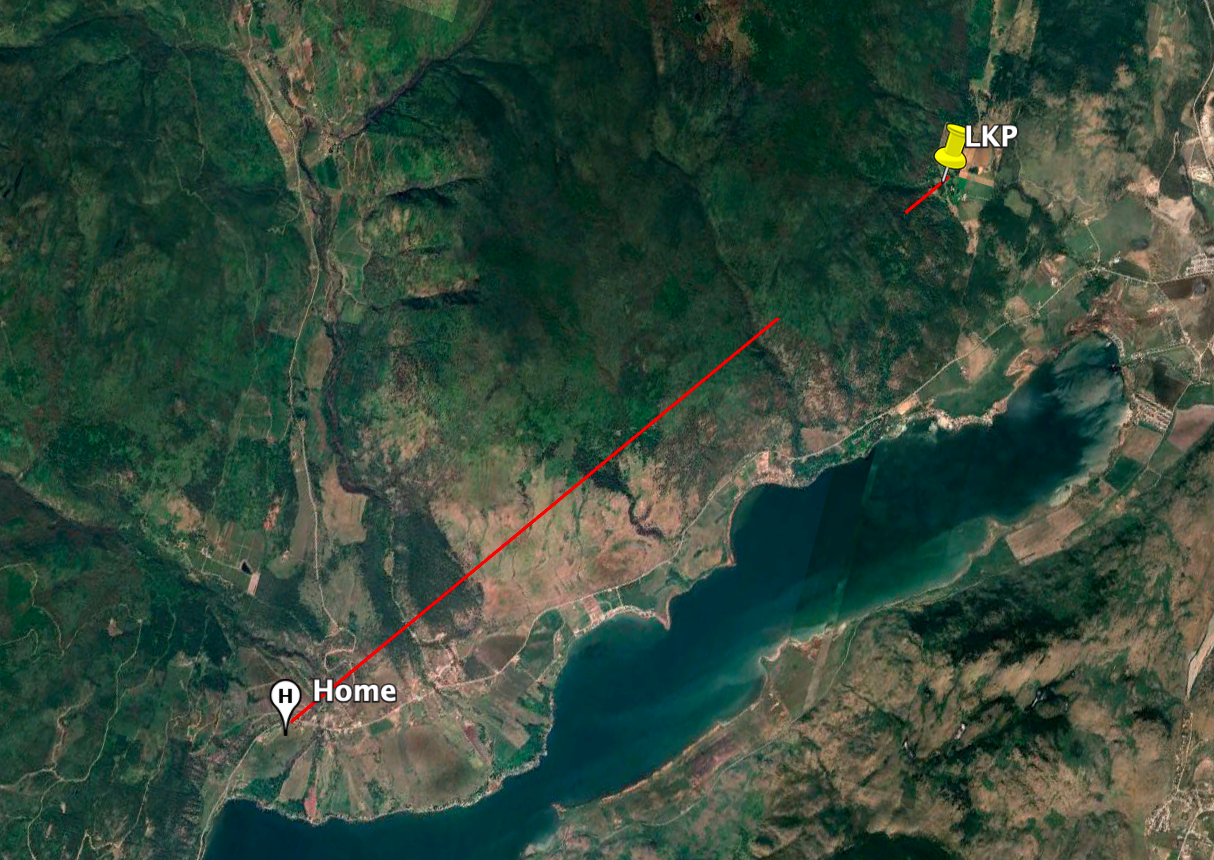

Example Scenario:
In the example above, the line intersects a hill, suggesting a potential crash site
Draw a polygon around the area where the is the potential crash site (e.g., where the line intersects the obstacle)
Save both the line and polygon to your computer
Now that we’ve located where the drone might be, we need to figure out how to get there
Step 4: Map and Navigate to the Crash Site

Save Potential Crash Site
Save both the line and polygon to your computer
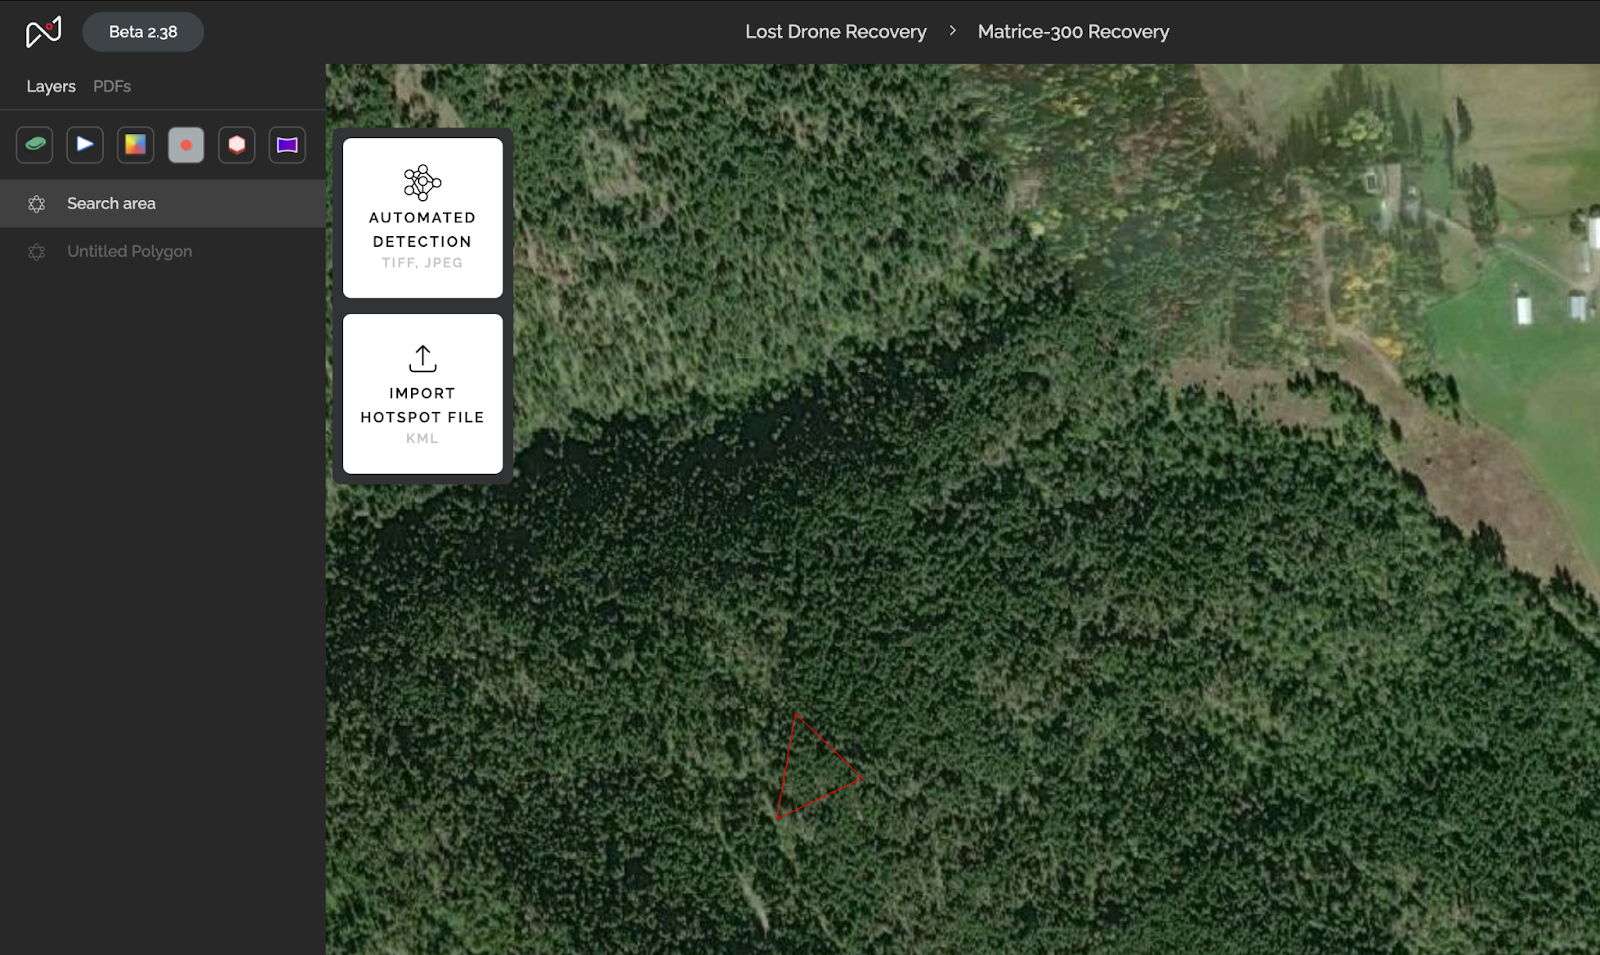
Create a Project in Nova
Import the saved line and polygon files into Nova
Use Nova’s tools to create a detailed project map that includes the potential crash site and surrounding terrain

Export a GeoPDF in Avenza Maps
Generate a geo-referenced PDF map from your Nova project for offline navigation.
Open your geoPDF in Avenza Maps
Import the PDF into Avenza Maps
Use Avenza’s tools to navigate precisely to the potential crash site, even without internet access
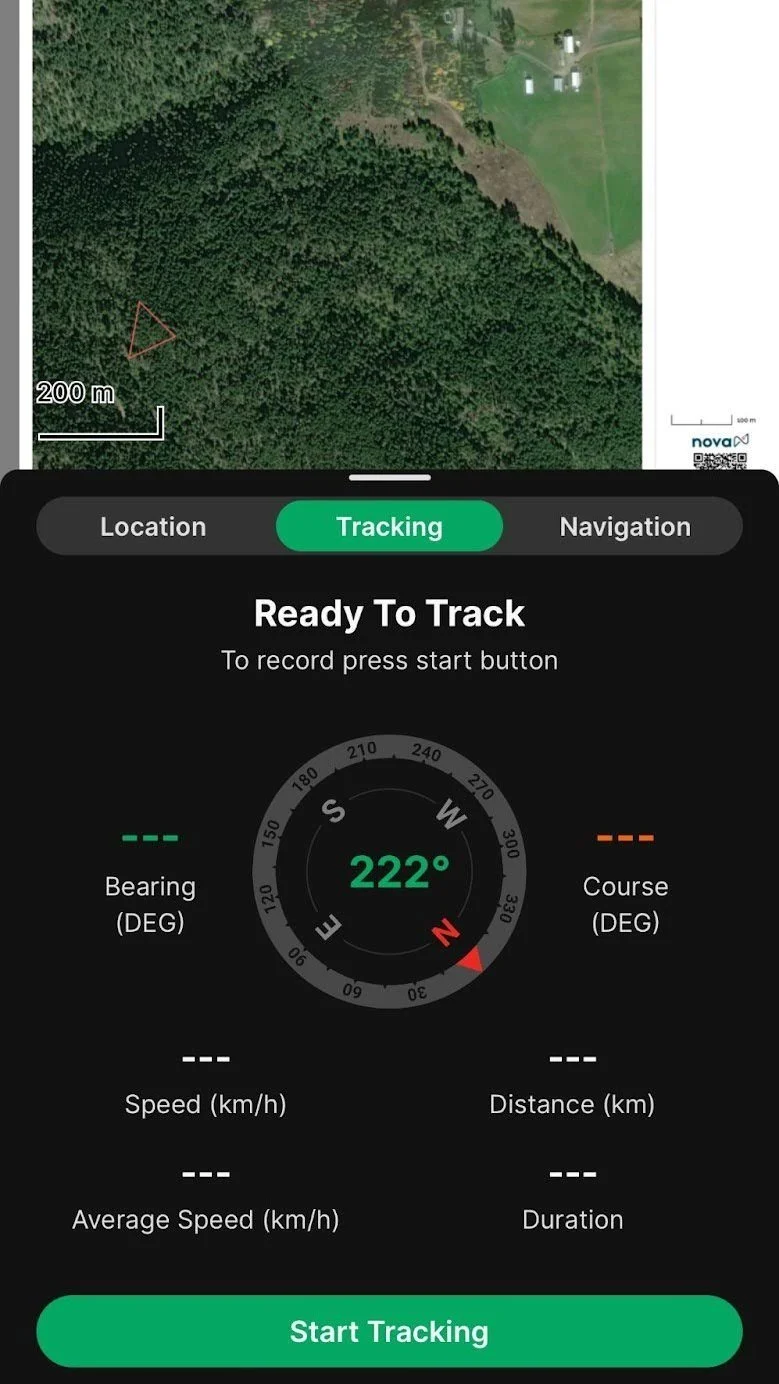
Tip: Enable Tracking for Clarity
Activate the tracking feature in Avenza Maps to visualize your search progress. This tool helps you see exactly where you’ve already been and identify areas that still need to be explored. By following these steps, you can narrow your search area from square kilometers to mere square meters.
Step 4: Prepare for Future Incidents
If you’re reading this, chances are you’ve already experienced the frustration of losing a drone. To make future recoveries easier, follow these proactive steps:
Capture a Visual Reference:
Before putting down your controller, take a screenshot of the map view with the satellite base layer enabled. This gives you a visual reference of the drone’s last known location.Record Critical Details:
Write down the following information while it’s still available on your controller:Return-to-home (RTH) altitude
Last known altitude of the drone
Remaining battery life
Wind speed and direction
This information is your lifeline if the flight data doesn’t sync properly later. By capturing it now, you’ll save yourself from unnecessary guesswork during the recovery.
Handle Low Battery Situations with Confidence
Update the Home Point: Change the home point to the drone’s current position. This ensures the drone will attempt to land nearby, simplifying your recovery efforts.
Activate “Find My Drone”: If you’re close to the crash site, use the “Find My Drone” feature. This triggers a beacon that emits a flashing light and a beeping sound, making it easier to pinpoint your drone’s exact location. This simple tool can save you significant time and increase your chances of recovery.